How to Get the Most Out of Your Head of American Uncle Sam Graphics
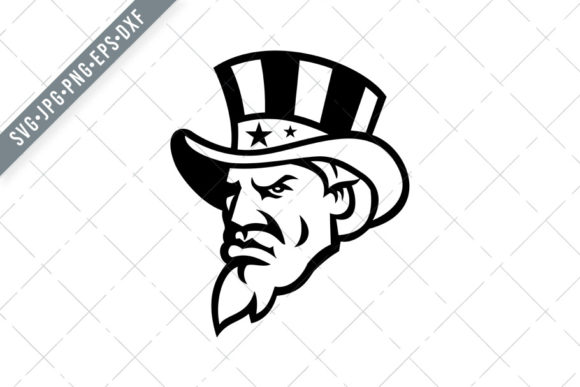
When you download a Head of American Uncle Sam graphic, you’re getting more than just an image. This versatile retro-style mascot—featuring the iconic top hat with stars and stripes, viewed from the side against an isolated background—has become a favorite for creators, small business owners, and hobbyists alike. Whether you’re designing T‑shirts, mugs, stencils, party invitations, or scrapbooking patterns, the provided file formats (SVG, PNG, DXF, EPS, JPG) give you flexibility across many projects. Yet even with all these options, people often make avoidable mistakes that affect quality, usability, and cost. Let’s walk through the common pitfalls and how to sidestep them so you can use your Uncle Sam illustration with confidence.
Mistaking Vector Files for One‑Size‑Fits‑All Solutions
A major misunderstanding is thinking all vector files work the same way. The SVG, DXF, and EPS included with your Head of American Uncle Sam set are each designed for different environments. SVG is excellent for web use and for cutting machines like Cricut and Silhouette Cameo—but only if the paths are properly closed and the image is not overly complex. DXF is a favourite for laser engravers and some CAD software, yet not every DXF exporter retains the same layer information. EPS is a professional print format, yet many home users open it only to find missing fonts or unexpected strokes.
Practical advice: Before starting any project, open the file in a preview application (like Adobe Illustrator, Inkscape, or even your cutting machine’s software) to confirm the artwork looks correct. Look for stray points, overlapping open paths, and scaling behaviour. If the SVG shows gaps in the top hat’s stripes, that will result in a messy cut. Similarly, DXF files should be axis‑aligned and free of duplicate lines. Test a small scrap piece of material before committing to a final T‑shirt or mug.
Overlooking Resolution and DPI for Print Projects
One of the most common complaints I hear is, “I downloaded the PNG, but it came out blurry on my coffee mug.” The problem usually isn’t the file itself—it’s that the user forgot to check the DPI. The PNG in this set is 300 dpi and sized at least 10 inches, which is perfectly adequate for most print applications. However, if you scale it up beyond that size in a raster editor, you’ll see pixelation. Conversely, scaling it smaller is fine, but you might lose fine details in the hat’s stars if you shrink it too much.
What to do: Use the vector formats (SVG, EPS, DXF) whenever you need to change size for print. They scale without loss. If you must use the PNG, keep it at 100% or adjust it only down to about 70% of its original size to maintain crisp lines. For heat transfers or screen printing, always export from a vector source at the final output size with 300 dpi. A simple test print on paper before pressing a T‑shirt can save you from wasting a blank garment.
Ignoring Background and Isolation Details
The Head of American Uncle Sam illustration is provided on an isolated background, which means you can drop it into any design without extra removing work. Yet many people assume the isolation is perfect for every use case. For example, if you place the PNG directly into a scrapbooking layout or a greeting card, you might see a faint white halo around the edges where the original background was removed. This happens when the image is not saved with proper anti‑aliasing or if you accidentally download a JPEG version (not included in this set, but beware of other sources).
Better approach: Use the SVG or EPS for any layering, because true vector isolation has no background artifact. If you’re working in a raster program like Photoshop, bring in the PNG at its native resolution and use a layer mask rather than erasing, so you can fine‑tune edges. For cut‑and‑paste into document templates, consider using the DXF for precision, especially for vinyl craft projects where a tiny remnant of background could ruin the adhesion.
Choosing the Wrong File for Your Cutting Machine
Silhouette Studio and Cricut Design Space each have preferences. Silhouette users often prefer SVG or DXF, while Cricut users lean toward SVG. But not all SVGs are alike. The Head of American Uncle Sam SVG from this set should work well, but I’ve seen cases where the file is too detailed (e.g., too many tiny star cutouts inside the hat) causing a machine to stop or tear the medium. That’s not a flaw in the graphic—it’s a misunderstanding of what the machine can handle.
Practical rule of thumb: For small‑scale cuts (like a sticker or card), simple outlines work best. If you want to keep the detailed stars and stripes, increase the design size so those details are physically large enough for the blade to navigate. Many crafters enlarge the design to at least 4 inches tall before cutting on a 12×12 mat. Also, always check that the file type you import matches your machine’s recommended format. Some older software versions require a manual “trace” of PNG images—a step that the vector files eliminate entirely.
Underestimating Commercial Use and Licensing
One mistake that can cost small business owners real money is assuming a “personal use only” graphic is okay for selling products. The product description for this Head of American Uncle Sam set says “Create your own T‑shirts, mugs, stencils, wall art, greeting cards and much more.” But it does not always specify if that includes commercial resale. Many clip‑art sets restrict sales of physical items to a certain number or require attribution. Even though this set appears designed for broad use, you still need to read the actual license agreement provided with your download.
How to protect yourself: Look for a separate EULA (End User License Agreement) in your download folder. If it’s missing, check the shop or marketplace page where you purchased the file. Commercial‑use licenses typically allow you to sell physical products (like T‑shirts, mugs, cards) but may prohibit reselling the digital file itself or using it on print‑on‑demand platforms without a higher tier license. If you intend to sell dozens of variations, consider contacting the designer to confirm. A quick email can save you from a takedown notice later.
Neglecting Color Mode and Swatch Consistency
The black and white mascot illustration is straightforward—no color matching required. Even so, many users overlook how the file handles grayscale across different devices. When you print this design on a color printer, the black might come out as rich black (CMYK: C0 M0 Y0 K100) or it could be a composite black that gives a slight hue shift. For a uniform look, especially on mugs or apparel, convert the design to pure black in your vector editor before production.
Simple fix: Open the EPS or SVG in Illustrator (or Inkscape) and set the stroke and fill to a single flat black (K=100 in CMYK or #000000 in HEX). Avoid any grayscale values that might render as a faint gray on light garments. For white vinyl on dark shirts, invert the design to all white without gradients. The simplicity of this mascot actually makes it perfect for crisp, high‑contrast projects—but only if you unify the color profile early.
Rushing the Test Print and Assembly
I’ve seen many crafters grab the PNG, drag it onto a mug template, and assume the final outcome will be perfect. Then they wonder why the hat’s top looks off‑center or why the stripes don’t align with the mug’s curve. The isolated background creates a sense of simplicity that can encourage sloppy placement. Similarly, for scrapbooking or card making, the design may be too large for the intended space, forcing you to crop it awkwardly.
Better workflow: Always import the vector file into your design software and use alignment guides. Print a paper copy first and hold it up to your object (mug, shirt, etc.) to judge placement and scale. For laser cutting or engraving, run a test on the same material type using a small scrap. The few minutes you spend testing will save you from having to order a new box of blanks and re‑create from scratch.
Assuming One File Format Works for Every Project
The set includes SVG, PNG (300 dpi, 10+ inches), DXF, EPS, and JPG. Yet many users only ever open the JPG because it’s the most familiar. The problem is that JPG compression introduces artifacts, especially around the fine lines of the hat’s stripes, and the background is not as cleanly isolated. Using the JPG for a large banner or pattern could result in jagged edges and a noticeable white halo.
Advice for each project type:
- T‑shirts & mugs: Use SVG or EPS—sharp at any size and perfect for print‑ready files.
- Stencils & vinyl cuts: DXF or SVG works best; DXF is often easier for laser cutters.
- Scrapbooking & cards: High‑res PNG (300 dpi) is fine, but ensure you import at 100% size. For repeat patterns, SVG gives seamless tiling without pixel loss.
- Banners & large wall art: EPS scaled in vector software keeps edges crisp regardless of dimensions.
- Digital use (blog, social media): PNG is ideal because of its transparent background and web‑compatible resolution.
Conclusion
The Head of American Uncle Sam illustration is a versatile, high‑quality asset when used thoughtfully. By understanding the strengths of SVG, DXF, EPS, and PNG, and by avoiding the common missteps around resolution, file choice, commercial licensing, and test runs, you can elevate your design projects from frustrating to professional. Whether you’re a hobbyist making a birthday party invitation or a small business owner printing dozens of mugs, taking a few extra minutes to check these details will pay off in better results, less waste, and more satisfied customers—or just more enjoyment in your own creative work. Always open the file, test your output, and remember that the right file for the job changes with each material and machine. With these practices, you’ll get the full value from your Uncle Sam graphics.